Gallipoli Beach Landings Survival Guide
Anzac Cove, Cape Helles, and the first deadly minutes when the boats hit the sand.
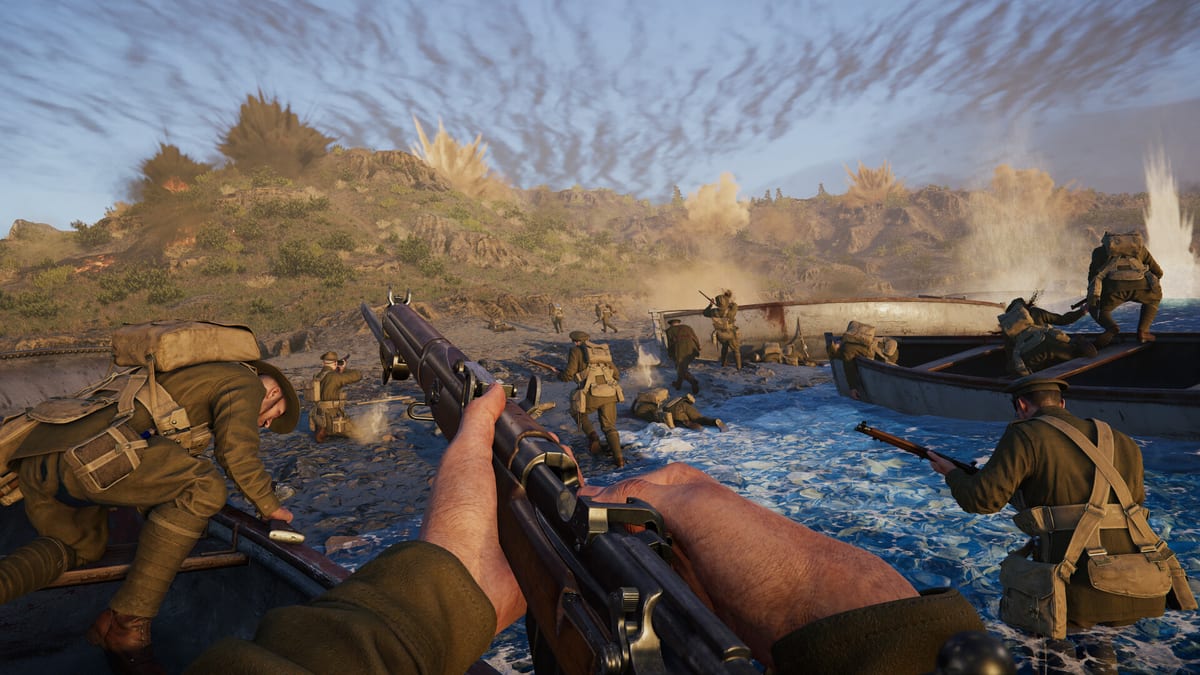
Beach landings are Gallipoli’s signature spectacle and its harshest teacher. One-shot-one-kill rules turn open sand into a geometry problem: angles, timing, and squad roles matter more than raw flick aim. This guide covers how to survive and convert landings at Anzac Cove, Cape Helles / SS River Clyde, and how those lessons transfer into desert approaches and Kut Al Amara street fights. For the dedicated southern peninsula deep-dive, open Cape Helles & V Beach beside the Anzac Cove map page. Read Expedition Mode first if you do not yet understand tickets and HQ secures — a pretty landing means nothing if the sector never flips.
Why landings feel brutal
Attackers spawn into exposed approaches with defenders already nested on ridges, bluffs, and prepared lanes. Heavy Machine Gunners who deploy early can erase uncoordinated waves. Snipers punish anyone who stands up to “check.” Suppression stretches every reload. The WW1 Game Series fantasy is intact: you are a soldier in a bad plan, and the only good plan is a squad plan.
New movement tools help, but they are not magic. Crouch and prone sprint let you stay lower while relocating. Bayonet charge wins the last ten meters, not the first hundred. Pings tell console and PC teammates which dune is actually safe. If those binds feel awkward, fix them in Controls before you practice landings.
Anzac Cove — dawn discipline
Anzac Cove scenarios emphasize the chaos of boats, shoreline, and climbing off the beach into scrub and slopes. Hands-on coverage describes rowing into shore under machine-gun fire — expect audiovisual chaos and a high first-death rate.
Attacker checklist
- Leave the boat or spawn with a purpose: left lane, center lane, or right lane — not “wherever feels cool.”
- First goal is cover, not kills. A rock, a dip, a wreck — anything that breaks silhouette.
- Ping the first confirmed nest. Do not assume everyone hears voice chat in a full crossplay lobby (Crossplay).
- Let Officers stage call-ins for the climb, not for the empty water behind you. See Squad Call-Ins.
- Move in short bounds. Crouch sprint between scrapes. Stand only when you shoot.
Defender checklist
- Pre-aim boat exits and the first standing silhouettes.
- Deploy HMGs on overlapping lanes, not stacked on the same rock.
- Keep a Stretcher Bearer behind the crest so one grenade does not delete your medic and your nest.
- When attackers touch secondary points that grant forward spawns, fall back to the next prepared line instead of dying on pride.
Cape Helles and the SS River Clyde
Cape Helles / SS River Clyde fights sell a different fantasy: assaulting from or around a beached ship and the fort approaches that made the historical landing infamous. Expect tighter funnels, more verticality near fortifications, and savage close-range trades once you leave the shoreline.
Attacker tips
- Treat the ship and shoreline debris as temporary cover, not a campsite. Lingering on the Clyde silhouette is free Sniper practice for the defense.
- Bombers should be alive for the first structure secure — River Clyde sectors love demolition steps.
- Light Machine Gunners clear rooms and trenches after the first break; Snipers should watch the exits, not sit on the deck farming.
- If you are downed on the ramp, call for revive only if a medic can reach cover. Otherwise give up and respawn with the next organized wave — ticket sense from Expedition Mode still applies.
Defender tips
- Hold depth. A single line on the water’s edge collapses when the first smoke lands.
- Save grenades for plant moments inside the fort approach.
- Ammo Bearers keep Maxims alive during long holds; dry guns lose Helles faster than bad aim does.
After the sand — deserts and Kut Al Amara
Not every Expedition stays on the peninsula shoreline. Desert maps punish the same mistakes with longer sightlines and less forgiving shade. Kut Al Amara shifts into Mesopotamian urban pressure: corners, windows, and short bayonet ranges.
Transfer rules from the beach:
- Open ground = bound and suppress, never stroll.
- Urban ground = clear corners with Bombers and Light Machine Gunners; keep Stretcher Bearers one room back.
- Always know whether you are fighting for a secondary spawn tool or the HQ plant this minute.
Class jobs on a landing
| Role | Landing job |
|---|---|
| Officer | Pace the wave, ping priorities, spend call-ins on the climb/plant window |
| Heavy Machine Gunner | Attackers: temporary mid-beach suppression after first cover. Defenders: overlapping kill zones |
| Sniper | Pick Officers and gunners; relocate after every two shots |
| Stretcher Bearer | Revive in scrapes, not on open tide lines |
| Ammo Bearer | Feed the nest that is actually working |
| Bomber | Survive until the secure step; do not waste yourself on the first ten meters |
| Light Machine Gunner | Flexible lane clearer once the first ridge breaks |
New players should rotate through medic/ammo once before they main Sniper. Landing IQ comes from watching where bodies pile up. Getting Started has a broader class primer.
Micro skills that stack
Silhouette control. If the sky is behind your head, you are already dead — crouch or prone sprint to a darker backdrop.
Sound. Maxims and bolt actions telegraph lanes. Use that audio to decide which dune is a trap.
Suppression as progress. Even non-killing fire that jams an enemy reload can buy the three seconds your planter needs.
Bayonet honesty. Charge when the enemy is reloading, stunned by explosion, or trapped in a trench corner. Charging a healthy deployed HMG across open sand is a highlight reel for them.
Revive math. Two players dying to save one body on open sand is a ticket crime for attackers. Drag fights into cover first.
Practice routine
- Run a bot-filled landing and ignore KD — count how many times you reached the first ridge alive.
- Repeat with a five-stack: one Officer, one medic, one ammo, one bomber, one flexible gunner.
- Scrim the same landing on defense until you can deny a plant without everyone sitting on one rock.
- Review which secondary objective actually opened the HQ. That review matters more than watching your kill cam.
Linked systems
Landings are where Squad Call-Ins feel obvious — artillery on a ridge during a climb is worth more than the same barrage on empty water. They are also where Controls mistakes show: misclicking stance or failing to ping a nest costs the whole wave. When your party spans Steam and consoles, confirm settings in Crossplay so you are not solving beach tactics and party bugs at the same time.
Survive the first hundred meters with patience. Win the sector with plants, tickets, and medics. That is the Gallipoli landing loop — historically grim, mechanically fair if your squad respects the sand.
Frequently Asked Questions
Quick answers to the most common questions.
Which landing maps should I learn first?
Anzac Cove for open shoreline timing and Cape Helles / SS River Clyde for ship-to-fort funnels. Then apply the same discipline to deserts and Kut Al Amara.
How do I not die instantly on the beach?
Prioritize cover and low silhouette over early kills, move in short crouch/prone bounds, and wait for suppression or call-ins before standing tall.
Should I bayonet charge off the boat?
Almost never. Save bayonet charge for the final meters into a trench, doorway, or suppressed defender — not the open tide line.
What class helps the landing most?
Officers and Stretcher Bearers quietly win waves; Bombers matter the moment a secure plant starts. Flexible Light Machine Gunners help once you leave the sand.