Gallipoli Ctesiphon Map Guide
Open desert ruins, the Arch of Ctesiphon, and the road that leads toward Kut.
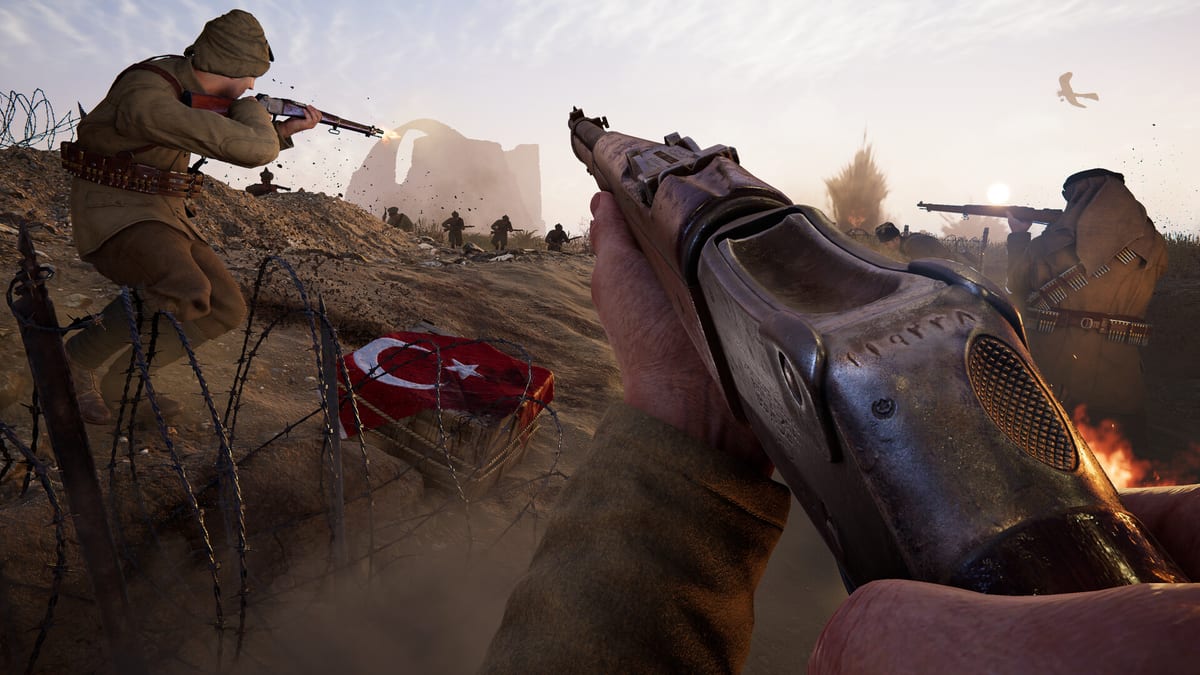
Ctesiphon is the Mesopotamian open-ground map BlackMill Games documented in its official map blog: ruins of an ancient city beside the Tigris, with the Arch of Ctesiphon (Tāq Kasrā) as the landmark players will remember from trailers. It is not another Anzac landing and it is not Kut’s bazaar. It is the desert approach where British Empire forces historically tried to push toward Baghdad after taking Kut, then ran into a prepared Ottoman line. In Gallipoli, that history becomes a three-sector Expedition fight with long sightlines, sparse cover, and a funnel under the arch. Watch the Introducing Ctesiphon trailer above, then pair this page with Kut Al Amara so you understand why the siege town exists as the next chapter of the same campaign.
For the full theatre index, return to the Maps Hub or the maps overview. For how sectors actually score, keep Expedition Mode open.
Why Ctesiphon belongs on day one
Official Steam copy repeatedly names the Arch of Ctesiphon alongside Anzac Cove, Cape Helles, and Kut Al Amara. That is the four-name map language the store is selling. If your squad only drills beaches, the first Ctesiphon queue will feel like a different game: more sky, more dust, fewer ravines to hide a revive, and machine-gun nests that see you a full sprint earlier. Spotters and Snipers gain value here. Stretcher Bearers have to plan drag routes instead of hopping a dune. Engineers who can drop sandbags on an otherwise naked ridge change the whole sector.
Historically, after the Indian Expeditionary Force took Kut, Major-General Townshend’s division marched up the Tigris toward Baghdad and met Ottoman defenders in the ruins of Ctesiphon. The British were checked, then fell back to Kut — which is why Kut Al Amara is a siege, not a parade. Playing Ctesiphon as if it were a beach landing wastes tickets. Playing it as if it were Kut streets wastes the HMG.
How the map is structured
BlackMill’s map introduction describes three sectors, each with a Headquarters. The first two sectors also carry an optional Support Objective. That matches Expedition’s HQ-plus-support pattern from the mode guide: you can advance by securing the HQ, while the support point restores Momentum, acts as a forward spawn, and fields mortars plus a field gun for the HQ fight. Because the support point cannot be locked the same way, expect constant recaptures on the optional site.
Sector 1 — ruins and the Vital Point
The opening sector sits in the remains of the ancient city. Cover is broken masonry rather than trench boards. The official write-up notes that the ruins still give enough height to watch anyone who crosses open ground toward the Vital Point. Attackers should treat every wall as temporary: it hides you from one angle and silhouettes you for a Spotter or Sniper on the next. Defenders should not stack the pretty ruin and ignore the Support Objective; losing the optional gun pit here makes the HQ plant miserable.
Sector 2 — under the Arch and the Gurkha Mound
Sector 2 is the postcard. Combat moves under the Arch of Ctesiphon, which funnels both teams into a handful of chokepoints and rewards whoever owns the shade first. The opposite side of the sector sits on the Gurkha Mound, a rise that looks back across most of Ctesiphon. That mound is Sniper and Heavy Machine Gunner country. If your squad is all Bombers, you will die on the approach. If your squad is all Snipers, you will never finish the HQ secure. Mix firepower roles with an Officer who actually calls the plant window.
Sector 3 — Tigris banks and the split HQ
The last sector leaves sand for more fertile ground and crops along the Tigris. The final Headquarters is a cluster of supply and artillery pits split by a river offshoot. That split is the tactical punchline: one side can win a firefight and still lose because the plant is on the other bank. Ammo Bearers and Stretcher Bearers need a crossing plan. Engineers who can mark a safer approach across the waterline are worth more than another rifle peeking the same mound.
Class jobs that actually fit the desert
- Spotter — previously Mountaineer in Isonzo. Open ruins and the Gurkha Mound are why this class exists on the Ottoman Front. Mark nests before the wave stands up. Details on the Spotter guide.
- Sniper / Heavy Machine Gunner — own the arch approaches and the mound. Do not duel from the same rock twice; Ctesiphon punishes greedy silhouettes. See Firepower Roles.
- Engineer — sandbags and wire on otherwise empty ridges. The Engineer guide covers Saboteur versus Frontline Builder kits from the official class blog.
- Stretcher Bearer / Ammo Bearer — long drags and thirsty HMGs. Read Stretcher Bearer and Ammo Bearer before you volunteer to “just rifle it.”
- Officer — call-ins across open ground are the difference between a coordinated push and a 25-person suicide. Officer Guide.
Riflemen still matter. They are the bodies that take the HQ once the mound is suppressed. They are not the whole plan.
Attacker habits
- Clear or smoke the Gurkha Mound watch before you commit under the arch.
- Assign a planter who is not your only medic.
- Use crouch and prone sprint from Getting Started so you do not stand up on the skyline.
- Take the Support Objective when Momentum is thin — Ctesiphon’s open deaths drain the pool fast.
- After a sector breaks, relocate immediately; looting the old ruin is how defenders reset.
Defender habits
- Pre-aim the arch funnels, not random palm clumps.
- Keep an HMG on the mound with an Ammo Bearer, not a lonely hero nest.
- Contest the Support Objective even when HQ feels safe; the field gun will punish a lazy hold.
- On sector 3, watch both banks of the split HQ. One successful plant on the far pit ends the map.
- Revive behind masonry, not in the arch doorway.
How Ctesiphon connects to the rest of the wiki
Study Anzac Cove and Cape Helles for landing language, then come here to unlearn it. After Ctesiphon, Kut Al Amara is the urban consequence of this failed Baghdad push. Weapons that feel perfect on the mound may be clumsy in Kut streets — check weapons & gunplay and the weapon tier list. If you are still shopping editions, price & editions and the out now page cover live storefront pricing.
Ctesiphon is the map that teaches patience on the Ottoman Front. Learn the arch, respect the mound, and do not treat the Tigris split as a screenshot backdrop.
Frequently Asked Questions
Quick answers to the most common questions.
Is Ctesiphon in Gallipoli at launch?
Yes. Official materials list Ctesiphon among the Ottoman Front maps, with the Arch of Ctesiphon as the landmark and three Expedition sectors.
How many sectors does Ctesiphon have?
BlackMill’s map blog describes three sectors, each with a Headquarters. The first two also have an optional Support Objective.
What is the Gurkha Mound?
A rise on the second sector that looks over most of Ctesiphon. It is a prime Sniper and Heavy Machine Gunner position opposite the Arch.
Should I play Ctesiphon like Kut?
No. Ctesiphon is open ruins and desert approaches. Kut is siege streets. Bring Spotters and HMGs here; save extra Bombers for Kut.